
So once we had an installation date for the woodburner, we knew we had some work to do.
Because what we were replacing was this:

That’s a gas fire with a fake surround, sitting in a plasterboard wall. No chimney breast was ever built on the extension, so it’s just a double layer of block, with plasterboard and then skimmed with plaster.
And not in any way fireproof.
Naturally behind a woodburner it gets a le-e-etle bit hot, and the fire regulations state there must be a safe distance to any combustible surface – this meant there was no way we could have the woodburner in place until we had changed the fabric of the wall.
We talked about the installation with the fitters (Low Carbon Energy Centre), and they said we could save a chunk of budget if we did the basic prep work ourselves. They explained what needed doing, and we felt it wasn’t beyond our capabilities, so we decided the sensible thing was just to go ahead and to tackle it.
The first job was to get the gas fire removed and the gas supply closed off safely – obviously we couldn’t do that bit ourselves, so we had a local CORGI registered engineer come in (which was about an hour’s job, and simply cost the standard callout fee).
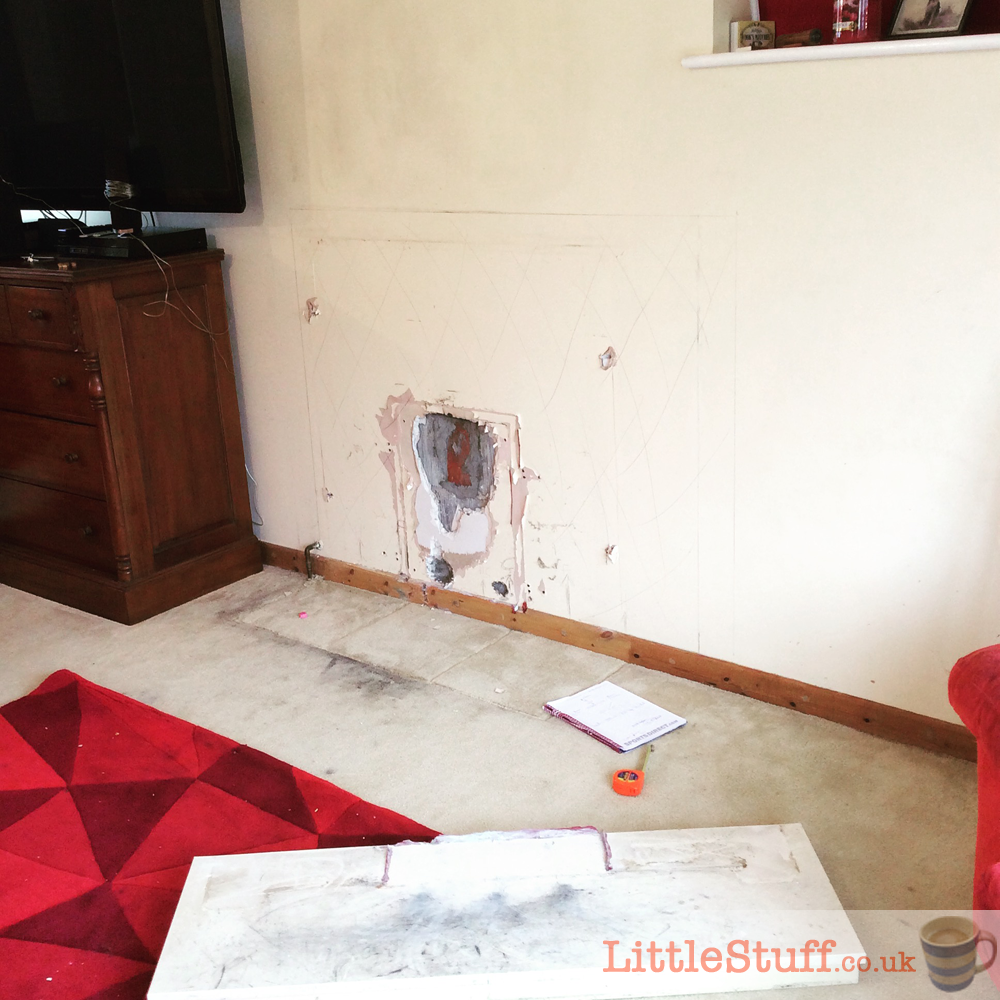
That left us with a hole through the wall, obviously, but Mr LittleStuff filled that pretty quickly with some cement and a couple of old bricks.
Next stage was for us to remove the offending flammable plasterboard. Low Carbon let us know the safe zone needed for the Villager 12 Duo woodburning stove that we had chosen following our visit to the Arada Stoves factory. Every stove has different safety requirements in terms of distance-to-combustibles, so it’s essential to check yours, and not go any further until you know the safety requirements of the stove you’ll be installing!
Next job was to remove the plasterboard…
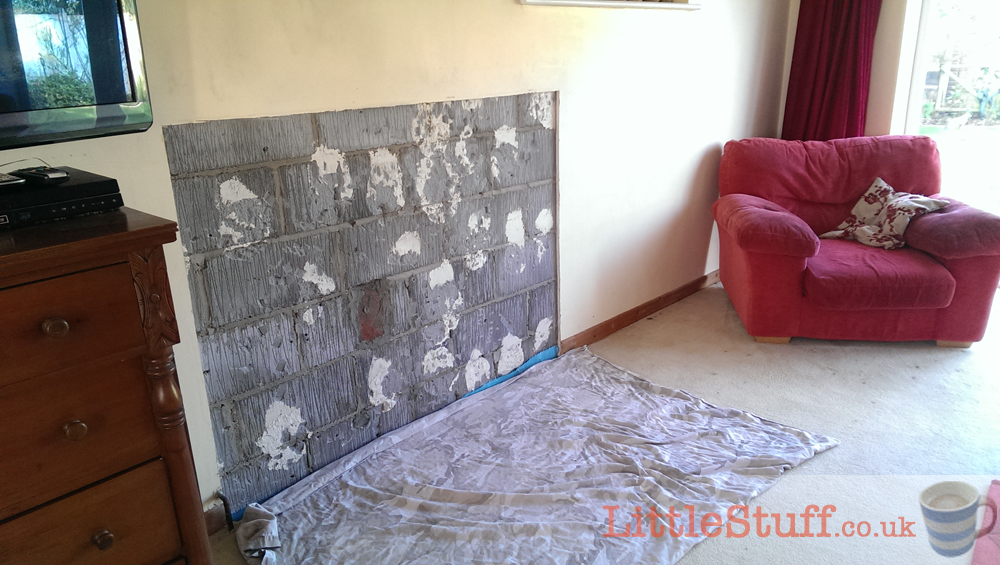
I’ll admit it – at this point I hot-footed off to London for the night and left Mr LittleStuff to the joys of the angle grinder.
It’s not a tricky job – once you’ve measured out the rectangle you need to cut then it’s a case of just getting on and cutting the edge – but it IS messy. The clouds of dust are ridiculous – it took three times longer to clean up than it did to chip it off! Some came away cleanly in chunks, but most had to be chipped off with a hammer and chisel once the outside edge had been cut. It’s a tedious and slow job, but it’s simple, and anyone can do it.
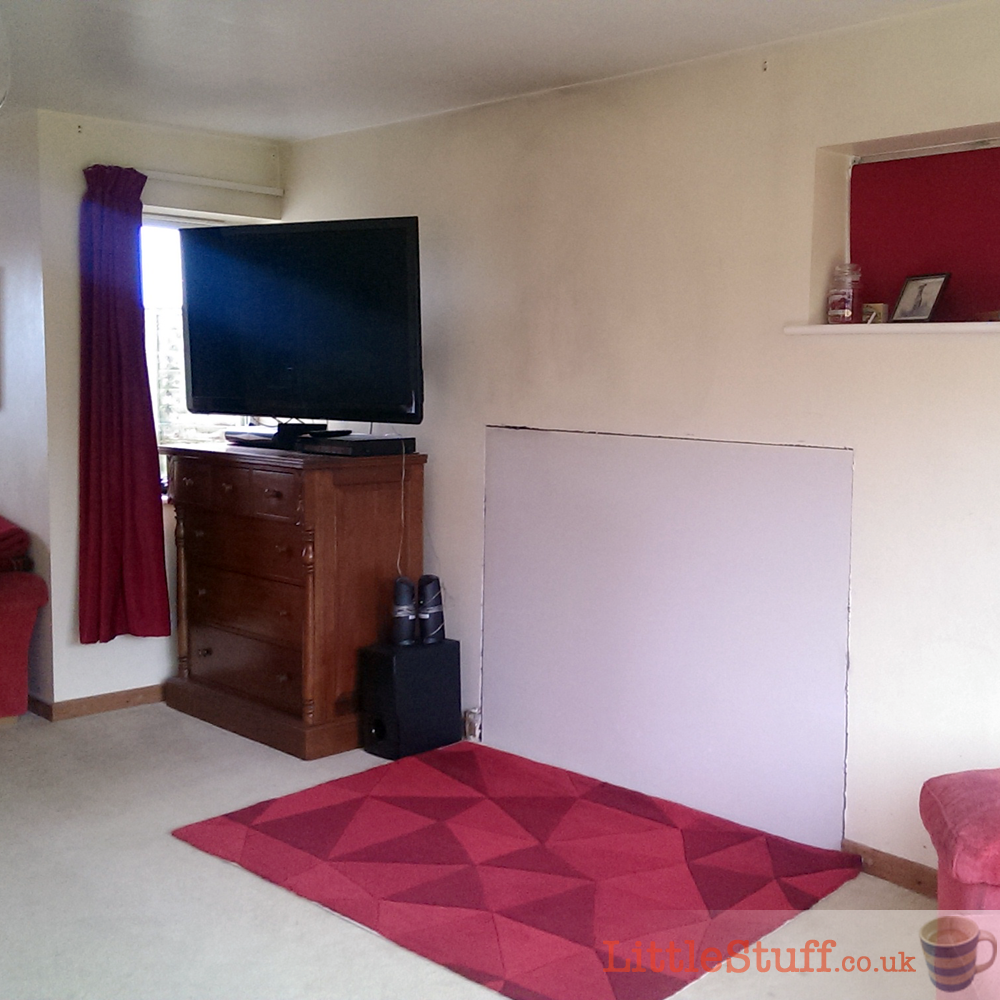
The last step for us before the fitters came to install the woodburner was to fit the fireproof sheet of Gyproc. This was from a local builders merchant, cost us just over £70 and we asked them to cut it to the exact size of our hole to save us any of the cutting issues.
NB – this stuff is VERY HEAVY – it took two of us to walk it in from the car, and handling a large sheet is tricky.
We sealed the block work with PVA to ensure it would bond to the adhesive, and the next day we simply used a couple of tubes of Fire Retardant Silicone Bonding to seal around the edges and then dab all over the surface of the block work.
Then it was just a case of levering the board into place and applying pressure for a few minutes until it had stuck.
Our measurements were pretty good, we just had a small gap around the edges but knew we could fill that with filler before we tiled.
And that was it – we’d saved ourself almost a thousand pounds by doing it ourselves rather than having someone else do the donkey work for us, and we were totally ready for the Woodburner Day :)
Trackbacks/Pingbacks